Showing posts with label diy passport cover. Show all posts

Sunday, June 12, 2011

10 things i couldn't live without this week:

1. got a "how to" up for you guys. this one is super easy and such a great blank canvas to really put your own spin on....the possibilities are endless.
2. jane, an old family friend, is a close follower of the blog. she's known me since i was a kid, as a matter of fact i used to babysit her two boys. love those kids. anyway she posted this on my facebook the other day:
Jane Nordstrom said... You inspire me everyday....
You have a gift and a heart of no one I have ever known...
You cherish from your heart!
i have to say that is one of the nicest things anyone has ever said to me. it honestly leaves me speachless.
3. putting exciting packages in the mail. check out what's inside here and here.
4. a healthy house. the hubs was sick all week, but he's finally feeling better. thank goodness.
5. a fantastic visit with with my mother in law, and finally giving her a birthday gift that has been in the works for quite some time.
6. making party decor for the boys 2nd birthday party. check out the tutorial coming soon.
7. the boys dino disco dance party. all of his favorite ladies were there....that boy, he's a stud. we got to hang out with all of my favorite lake worth ladies and their amazing familes.
8. taking my mom out on the town. we had a blast drinking snakebites and playing banana-grams....i am going to need this game.
9. long talks about life with my mom.
10. feeling lots of love from my family and friends this week. a lot of wonderful news has been coming my way, karma is not a bitch...karma is my biatch.

Tuesday, June 7, 2011

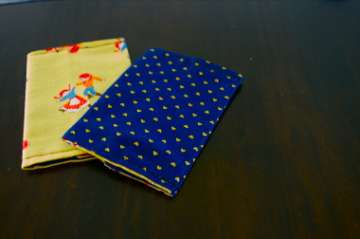
DIY: passport covers


this is one of the easiest tutorials and takes less than an hour to make start to finish. i made these in a snap for the sweet little lovers over at our august. what travel bloggers would love matching passport covers.

here's the handmade how to:

step 1:
cut two 12" x 6" rectangles out of contrasting fabric.

step 2:
pin and sew them together, right sides together with a 1/4" seam allowance. remember to leave your self a 2" opening to turn it inside out so that the right sides are facing out.
*tip: trim the corners off before turning inside out so that the seam will lay smoother.

step 3:
press flat. top stitch all the way around the rectangle.

step 4:
fold in 1.75" on one side and 2.25" on the other. press, pin and sew only along the top and bottom edges.

step 5:
fold in half, and press flat. and that's it. you are done. enjoy.

serve it up with a handmade card and you are set. love you anges and leonard.
Related Posts Plugin for WordPress, Blogger...