Friday, February 28, 2014

February Hikes


Moving to Colorado, I knew that a whole new world 
of out door adventure was going to be open up to me.
I am not the most athletic person in the world,
so you can only imagine the thoughts that race through my mind when people say:
"You are going to love learning to snowboard and ski!"
All I hear is:
"Blah blah blah blah broken leg blah blah"

But hiking, that's a little closer to my speed.
I am good a walking,
well most of the time.
Let's just say I am good at walking in 
Florida, on the beach, at sea level.


On our first adventure 
we went to Lookout Mountain.
Lucky for me…
It was flat-ish.
Yet we were in the snow up to our knees most of the time.
I was sold on hiking when one of the twins announced…
"Look at those deer over there!"
And sure and shit there were a group of deer just hanging out with us.
They were close, and didn't mind us passing by.
The boy was thrilled, waving and saying "hi deer!' as we passed.


I must note here that I had a different hike planned all together.
Having a plan and an agenda seemed like the most 
intelligent thing to do when setting out into the wilderness.

Well we got lost.
Like on the completely wrong mountain kinda lost.
I quickly learned a very important lesson…

While have a plan was good,
having an adventure was so much better.


This hike was an easy 1 mile loop,
which we learned is about the boys limit.
And the "lookout" part of Lookout Mountain…..


Yep, that's tiny little Denver down there! 
I wish that this picture did half the justice for this amazing view.
It really makes you feel so small when you look down on the earth like that.


Our second hike,
and one of my new all time favorite places,


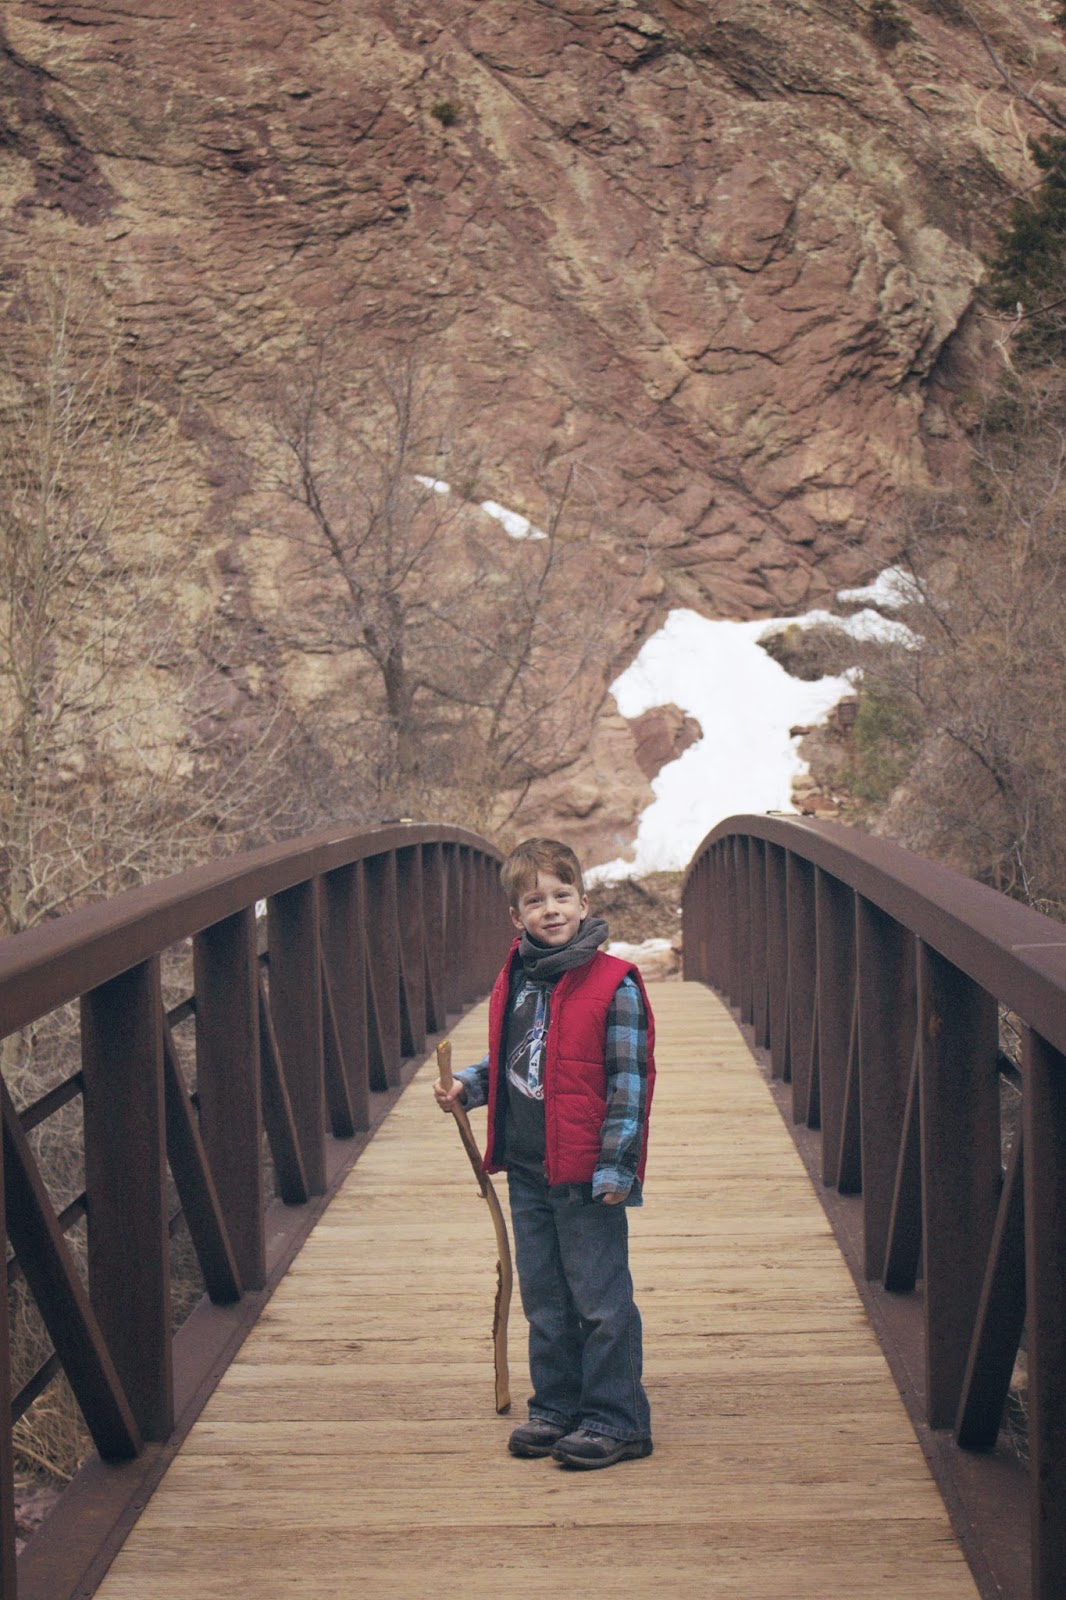
If you have never been to Eldorado and you are in the area, 
YOU MUST GO!


First of all, you drive into the Town of Eldorado Springs 
which is so stinking cute and small and you instantly wonder 
about the stories that the people who live here have to tell.
Also they have a natural hot springs swimming pool here….dying to go!

This was also the first place that I saw legit
mountain climbers on crazy runs! 
The person wedged up in the rocks up there,
that's not a legit climber…just our crazy friend Brad. 


Instead of pushing ourselves to see how 
high we could hike, we took a different route.
We zig zagged up and down the canyon following the river.

We found an awesome cave, some beautiful waterfalls,
and some amazing views.


This was one of the best adventures of my life.
So many times I was faced with a case of the 
"I can'ts!"
Not just from the boy but also from myself.
Together we faced our fears of heights.
We put our faith in each other and trust in the hubs to keep us safe
and catch us if we stumbled.


We did take one more hike in February that's not listed here,
because I forgot my camera,
but if you follow me on Instagram you 
saw some of the icey good times we had at Maxwell Falls.


I can't believe that it took me so many of my
less breakable years to find such a love and passion for 
the mountains.

It's all I can think about now.
The mountains are calling my name 
and I must answer.

Wednesday, February 26, 2014

DIY: Bleach Dyed Sweat Shirt


If anyone can figure out why oh why
I waited all these years to try bleach dying please let me know! 

I am kinda obsessed with single color 
tie dye which is what inspired this project.
Yet I have never tie dyed anything.
I have had this black sweat shirt for many many years.
It's always been one of my favorites,
but in recent times it's just started to look a little beat.

It needed something.
A pick me up if you will.
So a good bleach tie dye became it's fate.

I found this great DIY on 
Say Yes To Hoboken,
but as many of the things I see on Pinterest,
it didn't really work out for me.
I followed her directions to a T and the only results 
were one or two bleached out marks.

So I became frustrated with the project,
the hubs and I laughed at my waste of a 
perfectly good shirt, and I decided to take this project to the max.

At this point there was no coming back for this top, 
so my fears of "ruining" it went out the window.

I rinsed and rinsed the residual bleach from my first attempt.
I then re-twisted and rubber banded the top while it was still wet.

Part of my hesitation with tie dye or bleach dye in the past 
has been a lack of control, but I shook that off and just 
told myself that this wasn't an exact science.

After the sweat shirt was twisted and banded I
fully submerged the tangled mess into a bowl of straight bleach.

In the previous DIY steps that I had tried to follow
I was told that it would take 12+ hrs to see any change in color.
Well with my way it was almost instant.
With in about an hour I had the top out of the bowl.

I have to be honest with you,
at this point I was pretty sure that the next step for this 
beloved sweat shirt was the trash can.
The entire top appeared to be, well, tan.

I began to cut off the rubber bands on at a time,
as the shirt unraveled beautiful pinks, blacks, and creams were revealed.
Once I got the entire sweat shirt opened up I rinsed it until no more color 
bleed into the water.

I was so pumped up about how this top
turned out that I actually raided my closet for more things to
bleach dye.

Have you experimented with bleach dying?
I would love to see your projects! 
Share your secrets and results! 


Tuesday, February 25, 2014

the Crystal Shrine Grotto


Our next stop along our cross country trip was the 
Crystal Shrine Grotto
in Memphis, TN.


This one was literally a stones through from our hotel,
so we stopped in early morning on our way out of town.
Much to my dismay, Memphis has a lot more
to offer than the glitter and glitz of Elvis.

But this was a fantastic alternative.


This amazing man made cave won me over 
when I read that it was located in a cemetery.
The amazing works, that were created in 1935
by Folk Artist SeƱor Dionicio Rodriguez,
boasted so much mystery and awe. 


The pictures do the religious works absolutely no justice.
This is one that you are going to have to see on your own.


Again, a huge thanks to Road Trippers for helping 
us to discover such hidden gems (pun fully intended).

To learn more on the full history of the Grotto click here.
The Crystal Shrine Grotto is located at:

5668 Poplar Avenue
Memphis, TN 38119


Tuesday, February 18, 2014

the USS Alabama


Thanks to the app Road Trippers,
we were able to snag this great stop early on 
in our second day of driving.

We left out of Pensacola early in the morning and 
we were at the USS Alabama in no time.


I have been on my fair share of Military ship tours,
I have been fortunate enough to have that as a close part of my childhood and life.
But never have I seen the awe on a little boys face when he sets eyes 
on a battleship of this magnitude, never before this that is.


Exploring the ship like a 4 year old put it all in a completely 
different perspective.
Both the boys really enjoyed this one, and we could have 
spent the entire day checking out every nook and cranny of this place.


As an adult and photographer I found so much interest in all of the details on the ship.
I can't tell you how many pictures I took of tubes and pipes and wires.
There is something so ironically beautiful to me in all of the industrial utilitarian components.


This trip cost the three of us about $30,
but the cost of admission was totally worth if for the hour
of exploration and fine dose of history.


And the boy will always 
remember where he got his super sweet 
F-16 toy now.


the USS Alabama is located at:

2703 Battleship Pkwy
 Mobile, AL 36603


Monday, February 17, 2014

The Tallahassee Automobile Museum


The Tallahassee Automobile Museum was the first of many 
fun filled stops on our drive across the country.
We knew that we would have to break up our big adventure with little 
memories like this one in order to keep sane on a five day trip.

First, I must say that while every other second of our trip was planned 
and researched with the app Road Trippers,
this stop was just a happy accident.
We stopped across the street for gas and the giant 
Bat-mobile in the front lawn of the museum grabbed our attention.


I was sold from the beginning or our tour.
There were rows and rows and rows of every 
bad ass car that you could possibly imagine.


It was overwhelming and incredibly impressive to learn that the entire collection,
everything in the giant two story building was all owned 
by one person.

Then to later find out that not only was it privately owned, but every machine,
not just every car, but every machine
in the building worked….perfectly.


The museum should change its name to 
The Tallahassee Boys Toys Museum, 
because it was so much more than cars.

I am pretty sure they had one of every kind of golf club ever made.


As well as over 200 fully operational boat motors.


Oh and did I mention all the original Bat Man stuff?
Cars, subs, motorcycles, costumes and props from the movies.
Needless to say my boys mind was blown.


And don't forget about good ole' EK amongst the collection 
of two wheeled boy toys! 

Not pictured:
tons and tons of tin toys & every kind or gun and case knife ever made.

If you are in the area or just passing through,
I highly recommend the stop.
While it was one of the more costly stops on our trip it was highly worth 
the price of admission to see all of these bits and 
pieces of Automotive and American history.

The Tallahassee Automobile Museum 
is located at:

6800 Mahan Drive
Tallahassee, Florida 32308

Monday, February 10, 2014

DIY: Gallery Wall


I have been dreaming about this gallery wall for a few months.
Prior to our cross country move,
I had acquired a few really amazing pieces of art work
from some really talented friends.

It became very apparent to me that some of the 
artwork that I treasure the most all fit in the same 
color scheme, so I decided that they should all go together.

I am so happy to share with you how simple this wall was to put together.

Here's what you'll need:
artwork
hanging supplies (hammer, nails, ect)
newspaper
scissors
tape
sharpie

Step 1:


Pull together all the art work that you want to feature in your gallery wall.
Now is the time to play with the arrangement.
I must have placed all of my art work in about 10 different ways before I 
landed on one that I loved.

Honestly, this was the hardest part.
I looked at a lot of Pinterest post and decor magazines to 
finally decided that there didn't have to be a "RULE" on how to hang 
all of my treasures.

I knew that the large painting by
Brandon McLean
should be the heart of the wall.
I then realized I had a pretty nice balance of 
art to hang around it.

The moral is, don't let this part scare you.

Step 2:

Trace each from with your sharpie on news print.
Cut each one out.

Step 3:


Label each piece of news paper.
Line the paper up with the back of the frame and mark exactly 
where the nails and hangers line up.

Step 4:


Now it's time to tape all of the
news print to the wall.

This is also a great time to re-evaluate your arrangement.
It's much easier to change where you want your art to hang now, 
before you put holes in the wall.

I hung the large painting first 
(without making a template)
to mark the center of the wall as well as 
the correct height.

Step 5:


Go ahead and put your nail or screw
in the exact spot that your marked 
on the paper.

Once all your nails are in the wall remove the paper 
and hang your art! 

Viola! 

This really is an easy DIY that I was able to 
complete on my own in just under a few hours.
Enjoy!

P.S. Did you notice the amazing hot pink desk 
the hubs got me for my birthday?!?!
Found the mid century beauty on Craigslist.
It was already pink, but that was perfect with my color scheme!
I am so in love!


Thursday, February 6, 2014

Survival Guide: Tiny Little Ice Swords

I have a weakness for a long shower.
I have my entire life.
I blame it on being an Aquarius.  I'm a water baby for sure.

A nice hot steamy shower is my happy place.
Especially since becoming a mom, it is literally the only
alone time I get.

The hubs asks all the time what "I'm doing in there"….
Well the short answer is that I am enjoying my time and shaving my legs.

Technically is takes me about 32.5 minutes to:

1. wash my hair
2. apply conditioner
3. wash my body
4. shave my legs
5. wash my face
6. rinse

and that's moving at a pace that is relaxing and leisurely if you will.

So my very first shower in our new Colorado apartment went something like this…..

I got my water going, nice and hot, just the way I like it.
I then successfully completed steps 1 and 2 of my shower ritual.
Then came step 3, once I was completely lathered it hit me….
Thousands of tiny little ice swords.  Stabbing.  Burning.  Freezing.
My initial and only reaction was to scream.
Here I was 12 minutes into my shower and that was it….no more hot water.

Ice cold Florida water is so much warmer than ice cold Colorado water.  I mean it's single digits here people.  Ice swords I tell you.

I stood there covered in soap and conditioner, my heart racing, in full on panic mode.
I waited, shivering for a few minutes with the water off in the hopes that I could get that nice warm water back.  No such luck.
I fell to my hands and knees and rinsed myself off sponge bath style.

All I could think about after the freezing fucking fact was that I would never be able to shower again.

My second shower went something like this…
Skipped the hair washing (which I do all the time since I only deal with that mess about twice a week).
I went straight to washing and shaving.  I got one leg done and 1/3 of the way up the second, and then….
SWORDS!

Gah.

So now, here I am a week in.  My bathing schedule has taken a whole new turn.  12 minute increments broken down into a 3 day cycle moving at warp washing speed.  No more leisure, no more relaxing, strictly business, with the occasional bubble bath to shave both legs at the same time.
It's a bit ridiculous, but that's how this Florida girl is surviving Colorado showers.


Related Posts Plugin for WordPress, Blogger...